
Canon PRO-300 Printer Review - The Best Printer for Landscape Photography?
The Canon PRO-300 opens the door to many landscape photographers looking to print from home, combine that with some Fotospeed paper, and you could have the best printing combination for landscape photography.
With lockdown giving me a lot of spare time, I wanted to expand my knowledge of printing and make the jump to start printing my own landscape photographs from home. I’ve been printing my work for a while now, selling prints and calendars, as well as a few exhibitions. However, I’ve always wanted to learn the art of turning a digital file into a finished landscape photograph myself, so away I went…
The Printer - Canon PRO-300
After deciding to invest in my own printer, it was time to look into the options. One key feature I needed was a printer that used the same pigment inks as used on my larger prints which are done by the guys over at Fine Art Ink - therefore, my options were pretty simple, it needed to be a Canon printer that used the same Lucia Pro pigment inks to keep consistency across my prints.
I’ve always kept an eye on the printing market, and since 2013, the Canon PRO-10/10S printer was one of the most popular models for landscape photographers, along with the larger A2 variant, the PRO-1000. However, I don’t really need to print anything bigger than A3 from home, and the footprint is simply too big for what I need. My aim is to print several times a week at A4 and A3, while using it as the main workhouse for my seasonal box sets. So, when Canon announced the 10/10S successor, the PRO-300, that used the same ink as in the PRO-1000 but in a much smaller form factor, it got me EXTREMELY excited. Here are some of the reasons why:
Max Print: Borderless A3+ (Option to print panoramic papers up-to 990mm long)
Max Print Resolution: 4800x2400dpi
Dimensions: (W) 639mm x (D) 379mm x (H) 200mm
Inks: 10 x 14.4ml LUCIA PRO pigment inks with a dedicated chroma optimiser
3-inch colour LCD screen for menu navigation
1 x top feed and 1 x rear feed for heavier fine-art papers
Connection via USB, Ethernet or Wi-Fi
Weight: 14.4kg
Price: £699

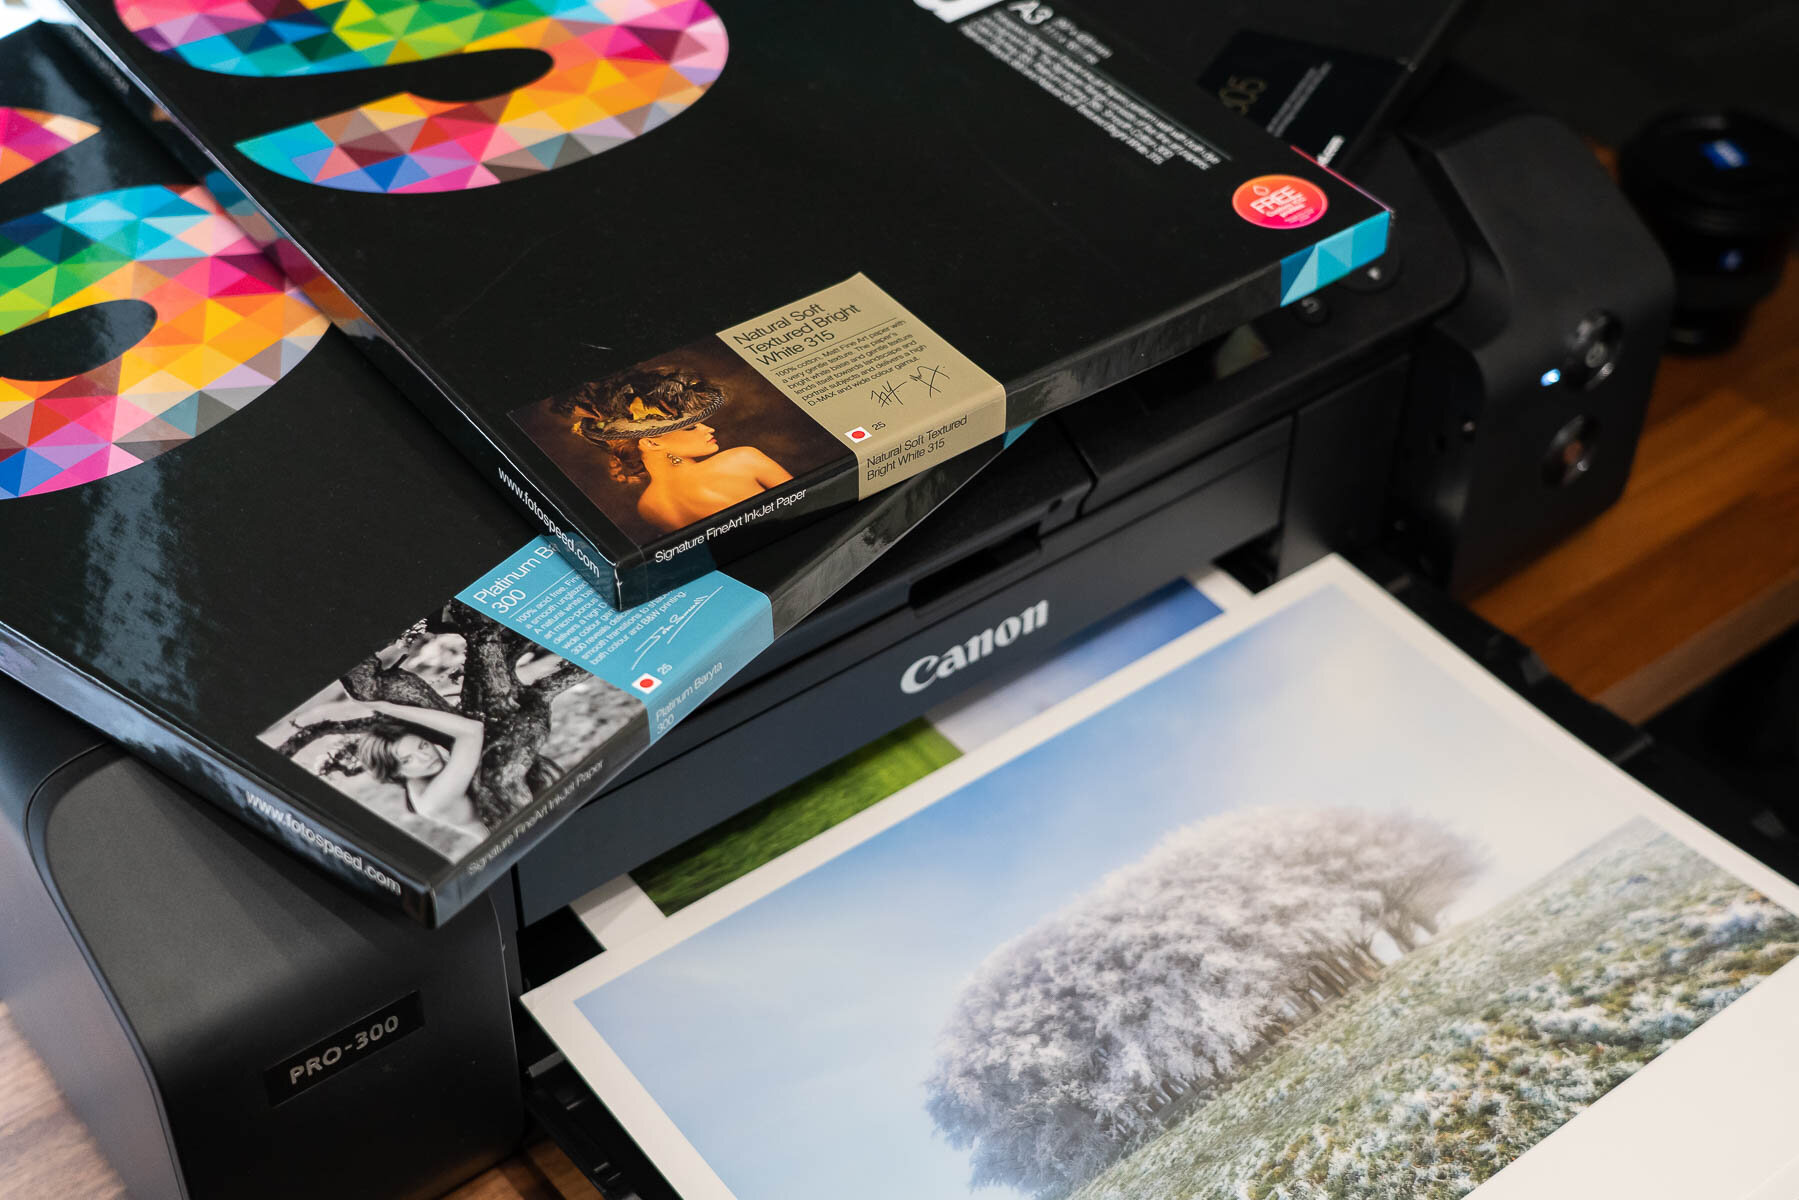
Taking the Canon PRO-300 printer out of the box, the footprint was surprisingly small compared to others I’ve seen, and fitted perfectly on my desk with room to spare.
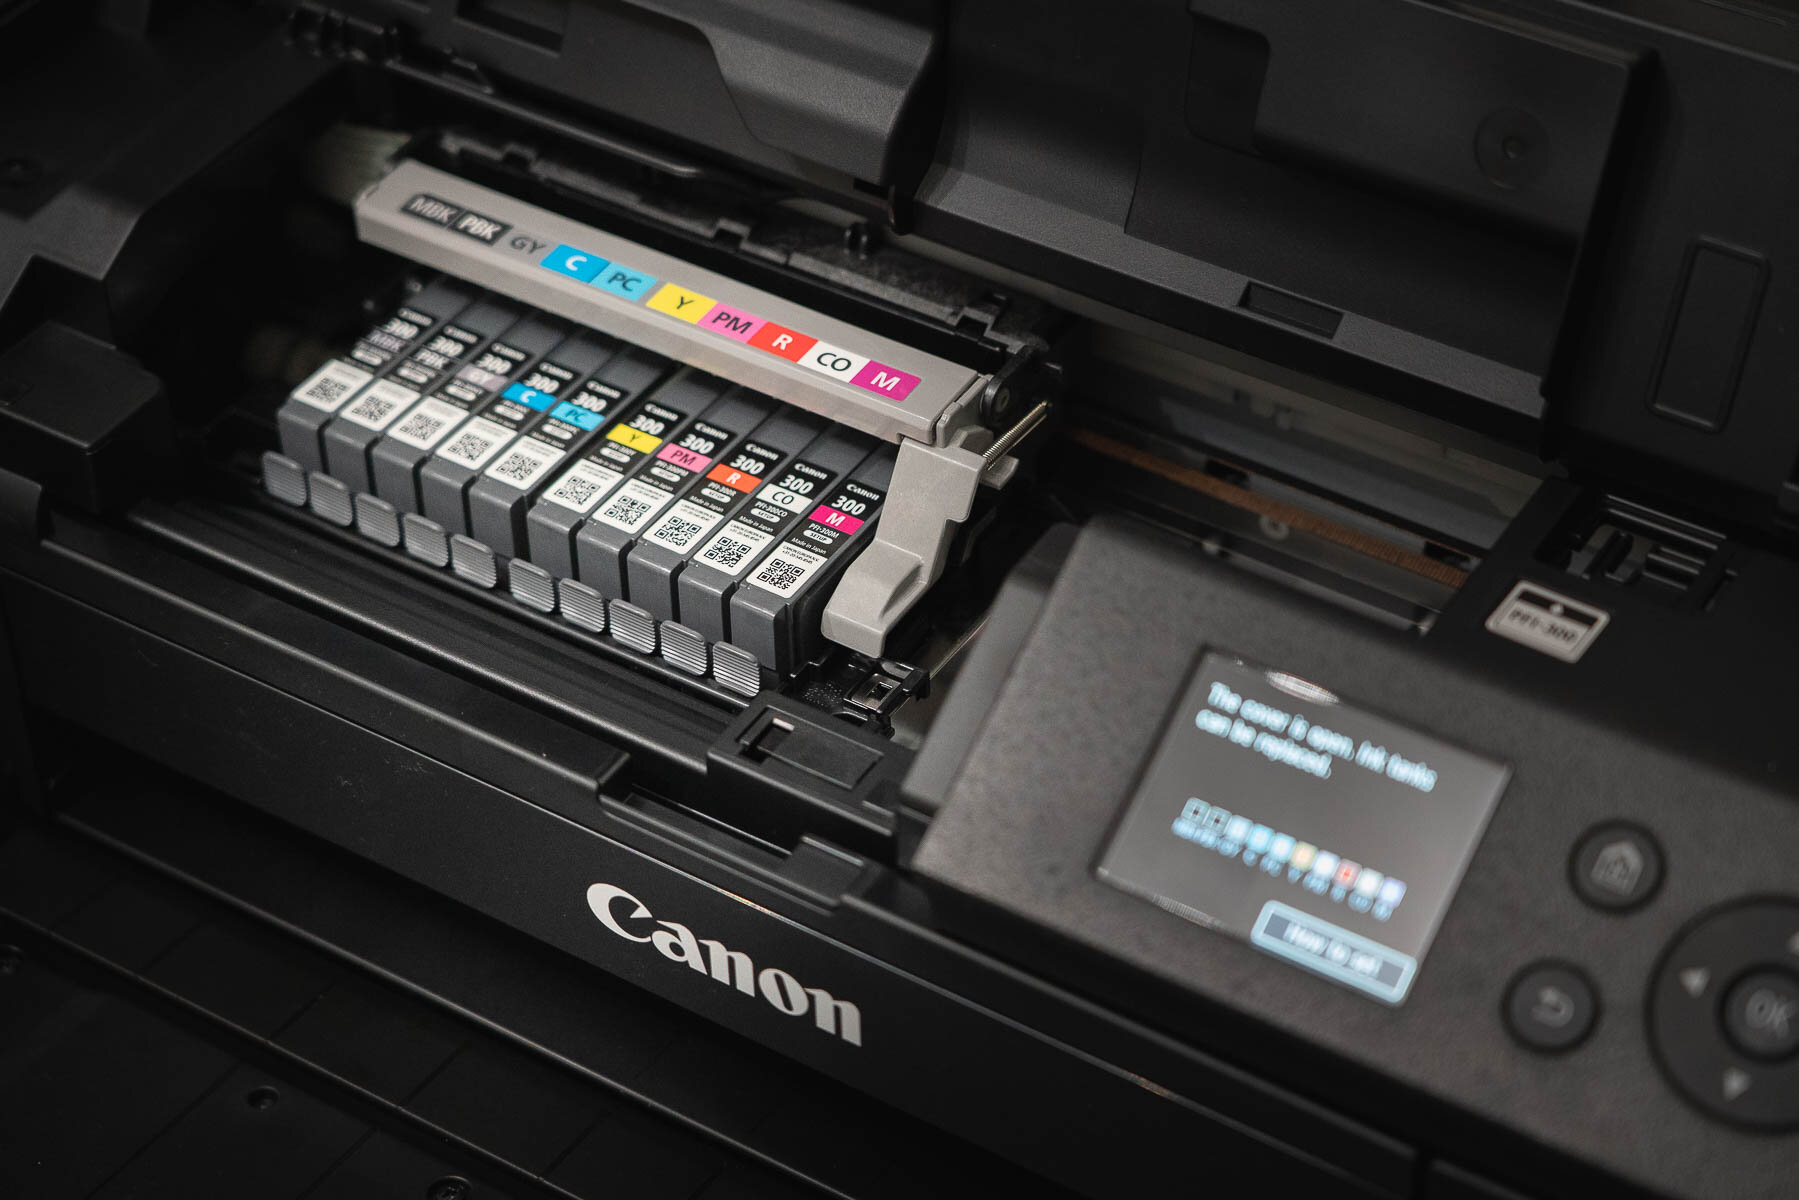
Installing the print head was super simple, as a first-timer, the instructions were super clear and loading the 9 x 14ml pigment-based ink cartridges plus 1 x chroma optimizer was just as easy.
First Impressions
In January 2021, I took the leap and invested in the newest printer offering from Canon, the Canon imagePROGRAF PRO-300 with the same LUCIA PRO pigment-based inks used in the bigger printers at Fine Art Ink, and a good selection of my favourite Fine Art Inkjet Papers from my favourite paper manufacturer, Fotospeed.
I’ve now had several weeks of heavy use from the printer, printing multiple limited-edition prints and producing my Winter 2021 Box Set. So, here’s my honest review of how the Canon PRO-300 and Fotospeed Fine Art Papers has improved the way I process and think about landscape photography, and how printing can help any landscape photographer do the same.

Once setup, the Canon PRO-300 fits perfectly on my desk and connected seamlessly to the internet via both an ethernet connection and Wi-Fi, although ethernet is my preferred choice.
Fotospeed Platinum Etching used for my A4 archival box sets came out perfectly with the PRO-300

Fotospeed Platinum Etching used for my A4 archival box sets came out perfectly with the PRO-300
For a first-time printer, I found the process of setting the PRO-300 up and printing my photographs super intuitive thanks to the Canon software and step-by-step guide. Over the last few weeks, I have printed over 100 A4 prints for my Winter 2021 Box Sets and about 20 A3 proof-prints, and my ink levels are still looking good with the Grey and Photo Magenta going down the fastest - this will vary completely from print to print depending on if you are shooting colourful skies or monochromatic seascapes/woodlands.
Let’s Talk About Inks
The Canon PRO-300 takes 10 x 14.4ml cartridges, 9 of which are inks and 1 of which is a Chroma Optimizer, each costing between £15-19 depending on where you buy them from. Now, this was a pretty big deal when choosing between the PRO-300 and PRO-1000 simply because I didn’t know how much I’d be printing each week. The PRO-1000 takes 80ml cartridges, over 5x the size of the PRO-300 and therefore will save more money per print, roughly 15p cheaper per ml of ink used, but is also recommended for people that are printing almost daily, something I wasn’t sure I’d be doing. Therefore, having the smaller 14.4ml ink cartridges in the PRO-300 seemed far more viable for what I want to be doing, with the option to change for a larger ink cartridge printer after a few years.
Printing Software - Lightroom or Photoshop?
Now, when it comes to printing software, I’ve tried three different methods including Canon’s very own Professional Print & Layout software that comes with the Canon PRO-300 printer. The first method I used was Lightroom, and for whatever reason I just couldn’t get it to work. It was great for soft proofing using the custom ICC profiles Fotospeed made me, but when it actually came to printing, the colours would come out wrong every, single time.
Canon PRO-300 Review - Photoshop provided a great platform for printing my files, and super-easy controls to add custom borders for mounting and framing.
After several attempts which still wouldn’t come out perfect, I quickly gave up after contacting a few people who said they also had issues printing directly from Lightroom. So, into Photoshop I went with my exported TIFF files and I had perfect results INSTANTLY. All I had to do was add my custom paper profile direct from Fotospeed and then use the settings they recommend for each paper type. For me, those settings worked perfectly and each print comes out almost identical to what I see on my calibrated monitor. Fotospeed provide printing instructions with each generic profile you can download for free, you can find them by heading over to their website here.
Depending on your image, I would always recommend creating a duplicate of the file in Photoshop, then adding adjustment layers to proof process for the paper of your choice, this will be non-destructive and allow you to brighten the image ready for print. I found that with most of my prints, I have to up the exposure by 0.1-0.3 of a stop and lift the shadows by using a curve adjustment - prints will always come out slightly darker than as they appear on your monitor simply because you are looking at a back-lit screen. Therefore, even though the image may look too bright on your monitor after you’ve made the adjustments, you should find it comes out near-perfect on the paper.
Canon PRO-300 Review - Professional Print and Layout Software
Printing Software - Canon Professional Print and Layout
Although I have got used to using Photoshop to proof and print my landscape photographs, Canon provide their brand new Canon Professional Print and Layout Software with all imagePROGRAF PRO series printers. Unlike the previous model, the PRO-10s, the new PRO-300 is classed as a PRO series printer, the same as its bigger brother the PRO-1000 and 2000/4000 series.
You can either use Canon Professional Print and Layout Software on its own or, as I prefer, as a plugin for Photoshop where it works seamlessly. Simply select the printer, choose the highest quality print settings and apply your ICC profile for the paper you’re using. I actually found using this software more accurate when adding a custom size border. For some reason, Photoshop has a few mm left around the edge before it adds an internal border, making it always a little bit of a guessing game. Adding a 10mm border to the top and left of an A4/A3 sheet was super easy in Canon’s software and definitely something I want to explore using a little more.
Why Print from Home?
One of the biggest reasons I wanted to get into printing myself was to be able to print while processing, allowing me to sit on images for a few days, even weeks, before sharing on social to make sure I am 100% happy with them. I feel like it’s really easy to edit solely for Instagram or Facebook, and I see it happen far too often with people mimicking “styles” and “presets” to get as much engagement as possible. Now, if this is your thing and it works for you, then that’s fine, but for me personally, I want to make sure I capture a moment as realistic as possible.
This was one of the biggest learning curves I’ve had since starting landscape photography, and actually helped so much within just a few days of printing. The photos below are exactly the same but with one key difference - one was processed straight after the morning I took it, and the other a week later after printing a few test prints. As you can see, they are completely different, and in my eyes it helped loads to print and hang on the wall for a few days, living with it and seeing if it can be adjusted to look better in print.

Pass 1 - Standard Processing
As you can see here, as soon as I printed the image it was clear the white balance was off. Instead of being a bright, clean white, the finished image looked blue and murky, with hints of purple. For reference, this was processed using a black background, a few weeks prior to getting the printer, and was left on my hard drive as I wasn’t 100% happy with the edit but couldn’t get my head around what was bothering me at the time.

Pass 2 - Processing for Print
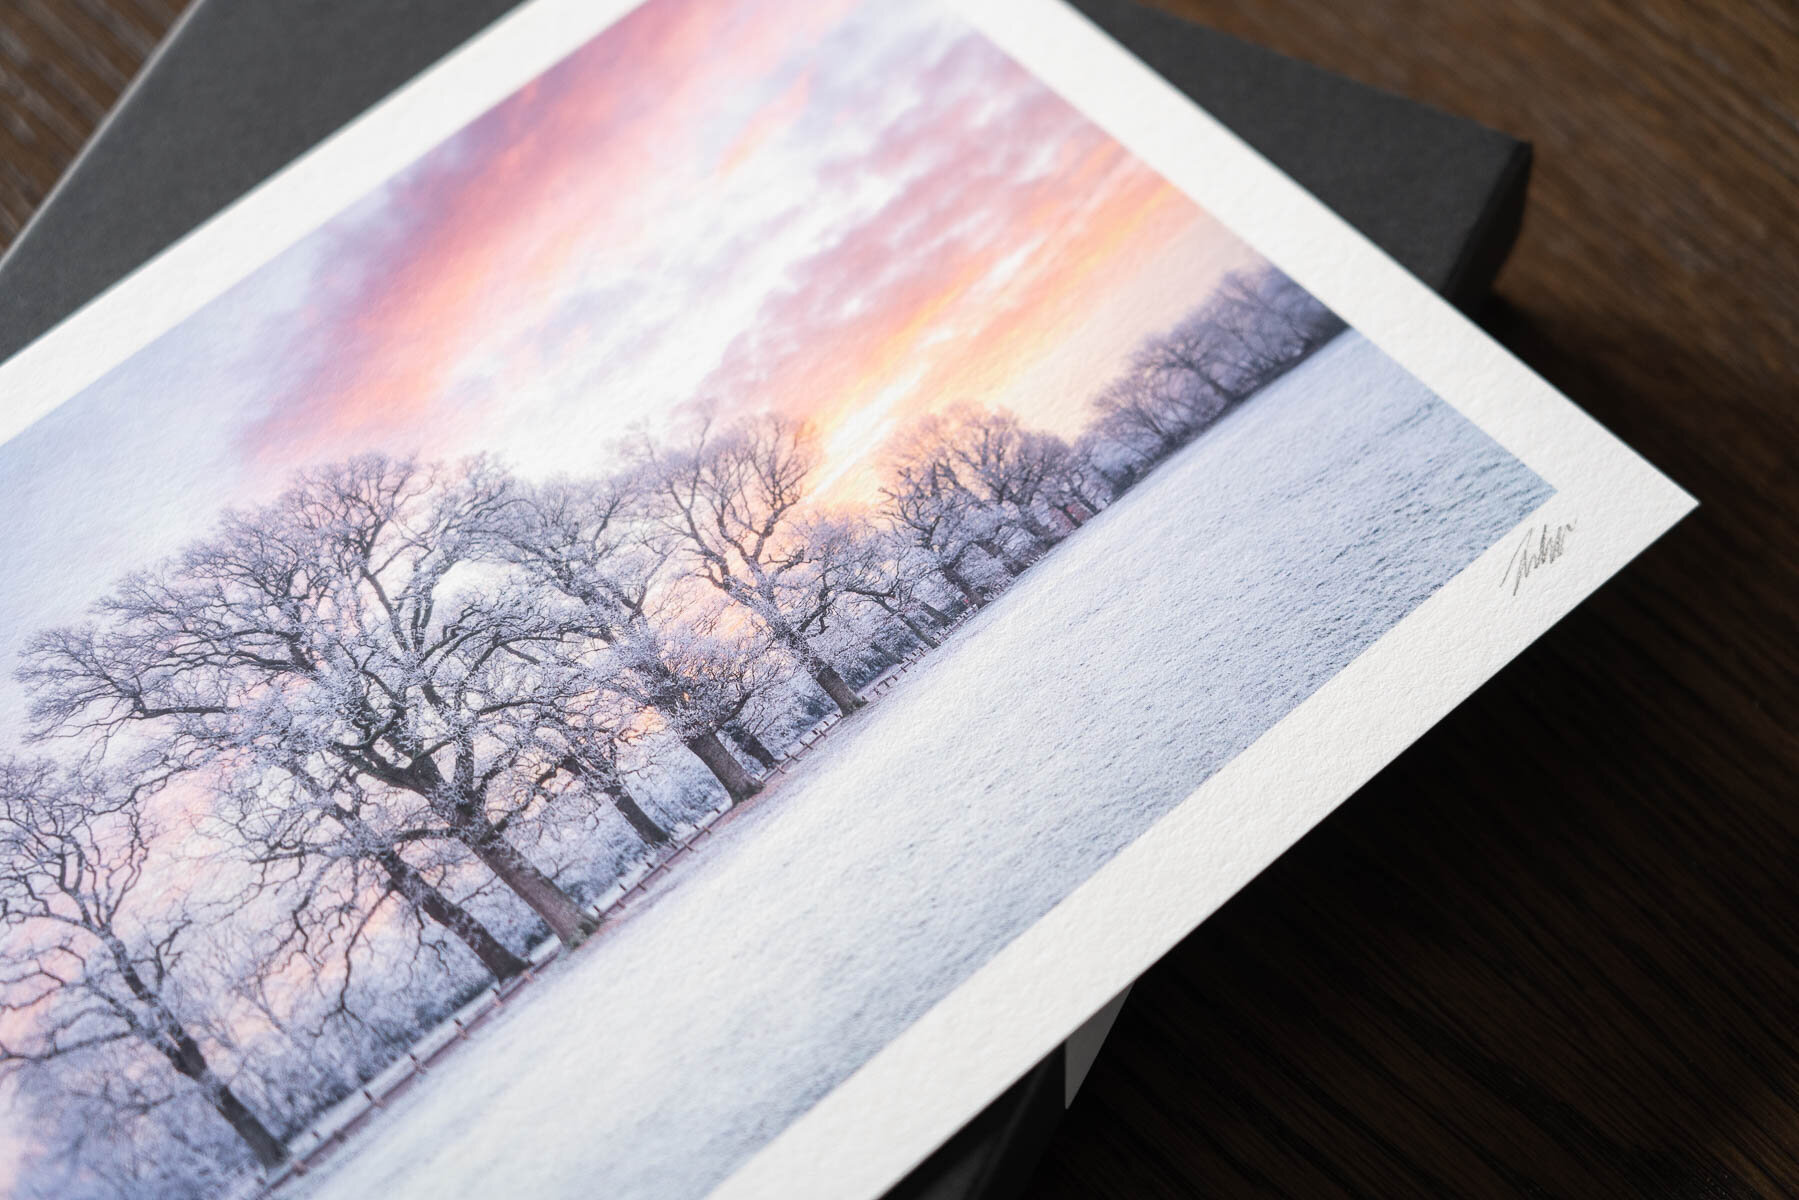
Now, in my eyes, this works so much better. As soon as I got the printer I printed the image on the left, and it was clear I needed to tweak the white balance, open up the shadows a little more, and fix the colours to make it feel more realistic to how it looked that morning. I also processed using a white background, and did two proof prints on the Canon PRO-300 using my favourite paper - Fotospeed NST Bright White.
The Paper - Fotospeed Fine Art Papers
The printer is just half the story when it comes to printing your landscape photographs, the next rather big decision is, which paper should you use? Well, in my eyes, you could be printing on the most expensive, large format printer on the planet, but if you aren’t using the best quality paper that best tells the story of your work, your results will be pretty disheartening.
A few years back when I got into printing my work with Fine Art Ink, I got introduced to Fotospeed and their HUGE range of papers. I had no idea how important paper choice would become until I started seeing my work in print - it’s really not as simple as just buying a printer. You have to think about the image, is it an atmospheric woodland scene with lots of texture? then maybe using a more fine-art feeling paper with soft texture will suit it more than a glossy, smooth surfaced paper? You also have to think about the end goal, is it going to be mounted, framed, both? where is it going in the room, opposite a window or in a dark corner of the house? Every one of these questions needs to be answered before choosing the paper you print on.
It’s an AMAZING process that I thoroughly enjoy and you can see in the picture below, it’s worth printing the same picture on several papers in the Fotospeed range to see how each one tells the story of your photograph. The Canon PRO-300 didn’t miss a beat with each paper I threw at it, from using 285gsm paper in the top feed, to 325gsm in the rear feed.
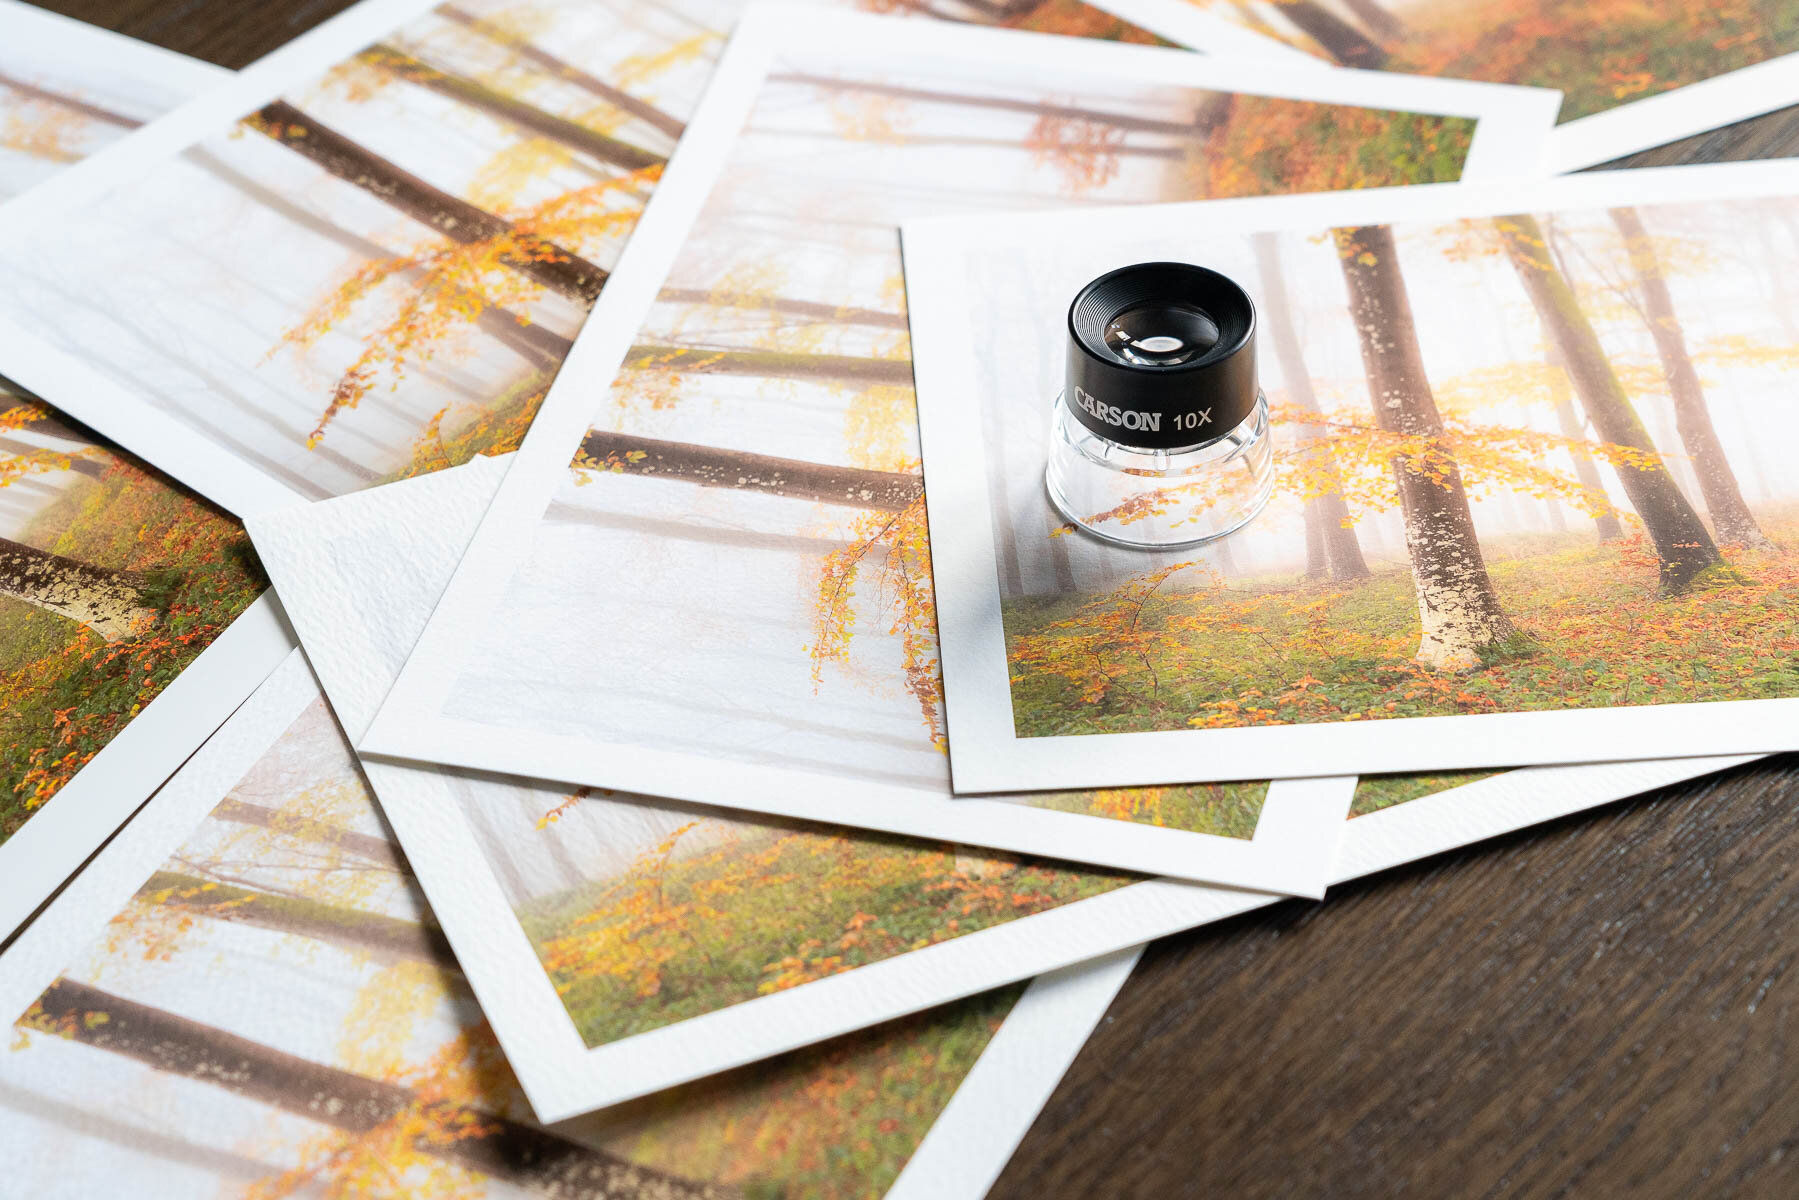
Canon PRO-300 Review - Fotospeed Archival Paper Test and Review with 10x Loupe
What Paper for Landscape Photography?
After testing a few different pictures on each of the papers Fotospeed offers in their range, I got to know how each paper performs on the Canon PRO-300 and see what worked and what didn’t for my landscape photographs. This of course, comes down to personal preference, and what subjects you shoot the most. For me, personally, after a lot of testing, these are my favourite papers in the range:
NST Bright White 315gsm - by far the most versatile and rewarding paper that tells the story behind each of my landscapes. The gentle texture and way it handles details and shadows is simply mind-blowing, every image I print on NST really does take my breath away, and that is why it is my paper of choice for all my Limited and Special Edition Prints.
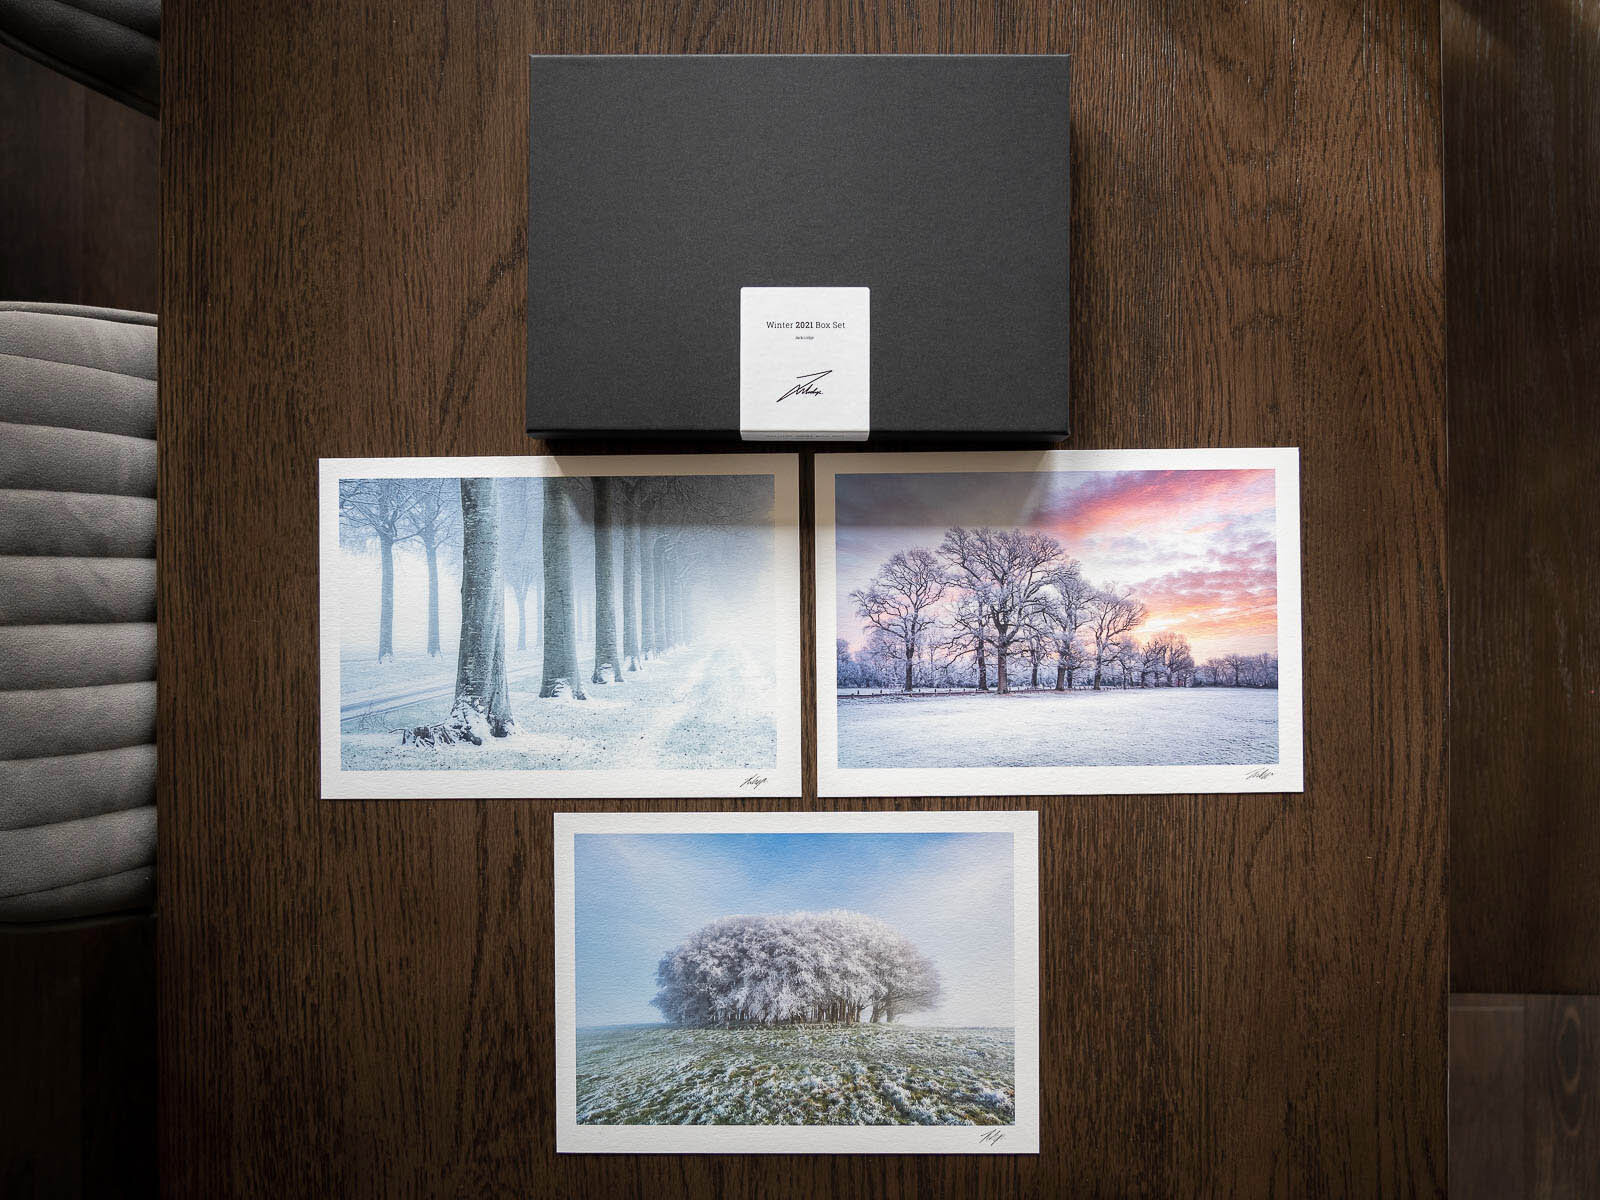
Platinum Etching 285gsm - if you want to make people say “wow” every time they pick up your prints, this is the paper you want to use. For displaying prints un-framed and when texture, feel and first impressions are everything, Platinum Etching delivers that real fine-art quality and works excellent for woodland photography. I am so impressed, this is my paper of choice for my Winter 2021 Box Set as it really makes the snow and ice come to life with some beautiful tactile texture.
Platinum Cotton 305gsm - with some of my images, I wanted something similar to my favourite paper, NST Bright White, but with less texture and a warmer feel, especially for my autumnal photographs. The more I print on Platinum Cotton, the more I love it. With a smoother finish compared to it’s sibling, Platinum Etching, the smoother surface works wonders for misty/foggy scenes where you want the background to appear soft and mystical as it fades into the background.
Platinum Baryta 300gsm - although I’m not the biggest fan of “glossy” papers for my work, there is one exception… and that is of course, Platinum Baryta. It’s classed as an unglazed gloss surface, and works incredibly well with high-contrast and colourful scenes. I’ve printed a few colourful sunrises on this paper and been blown away by the colour reproduction each time. I wouldn’t presume this Baryta paper is aimed at just B&W work as well, as in my view, it works perfect for those colourful landscapes, especially seascapes with wet rocks, and really draws you into the picture.
I would highly recommend ordering a few test packs from Fotospeed so you can see how textures, gloss and colours change from paper to paper. It really is an extremely fascinating and rewarding process. You can order your test packs directly from Fotospeed with 24h shipping via their website here.
Real World Use - Printing Box Sets on the Canon PRO-300
Although this blog is getting rather long, I hope it’s giving you a good insight into what printing your own landscape photographs is like, and how rewarding it can be. I wanted to show you how I’ve been using the Canon PRO-300 in combination with one of my favourite Fotospeed Papers - Platinum Etching, to create my limited-edition seasonal box set for Winter 2021.


The beauty of using the top feed for this paper was that I had no problem stacking 10 sheets and running them off continuously using Canon’s Professional Print and Layout software plugin for Photoshop - it really was super simple to use. With my custom ICC profile from Fotospeed, and a slight adjustment to the TIFF from Lightroom (overall bump in exposure and lift of the shadows) the images came out exactly the same as seen on my calibrated monitor - super impressive. In total now, I must have printed over 200 x A4 prints and I’m on my second set of inks. The PRO-300 hasn’t produced one bad print since I’ve started and it’s helped bring a vision of mine to reality.
Conclusion
In my eyes, as a landscape photographer, the Canon PRO-300 has completely changed how I look at my photographs, how I process them, frame up a composition in the field, my whole understanding of landscape photography has changed now that I can see them printed in a matter of minutes. Being able to hang them on the wall for a few days, maybe even a few weeks before I share them has become a huge part of my photography process.
If you are looking for a relatively affordable (in the scheme of things) route into printing from home, I have no doubts in recommending the Canon PRO-300 to any landscape photographer - especially when paired with some of Fotospeed’s incredible fine art paper. The archival qualities of both the pigment-based ink and the paper create the perfect base for selling and/or displaying your work in your own home, clients homes and even galleries when framed.
For A4, A3 and small panoramic prints, the PRO-300 will do everything you need, and the ink cartridges are perfect if you only intend to print a couple of times a week. If you are going to be printing more seriously, then something like the PRO-1000 (or it’s future replacement), or even the PRO-2100 will be far more cost effective in the long run due to the larger ink cartridges PLUS the ability to print larger. If you’re like me though, and you have a reliable print studio to print your large work, A3 is the perfect size and the ability to have the PRO-300 on your desk for when you need it is a no brainer in my eyes.
So what would I like you to take away from this review? Well, think about it. If your main goal is to get likes and shares on social media, then you’re missing out on the true beauty of photography. You’re just sharing a digital file that’s been processed and viewed on a 6” back-lit screen. My personal view is, it’s not a landscape photograph until you complete the process, feel the paper and explore every aspect of texture and detail in a finished print.

“Only when you print, does your image convey the authority you wish it to have.
The print is your photograph’s rightful inheritance.”